


the Z24 dyno mule story
Stage 3 - T3 turbo kit and blow through Weber 32/36DGV carby
Now that we have a 32/36DGV carby fitted to the engine, the next step is to blow some turbo boost into it. The 32/36DGV is the basis for our blow through carby kits, so part of the install is already done, its now time to install the fuel system and turbo kit.

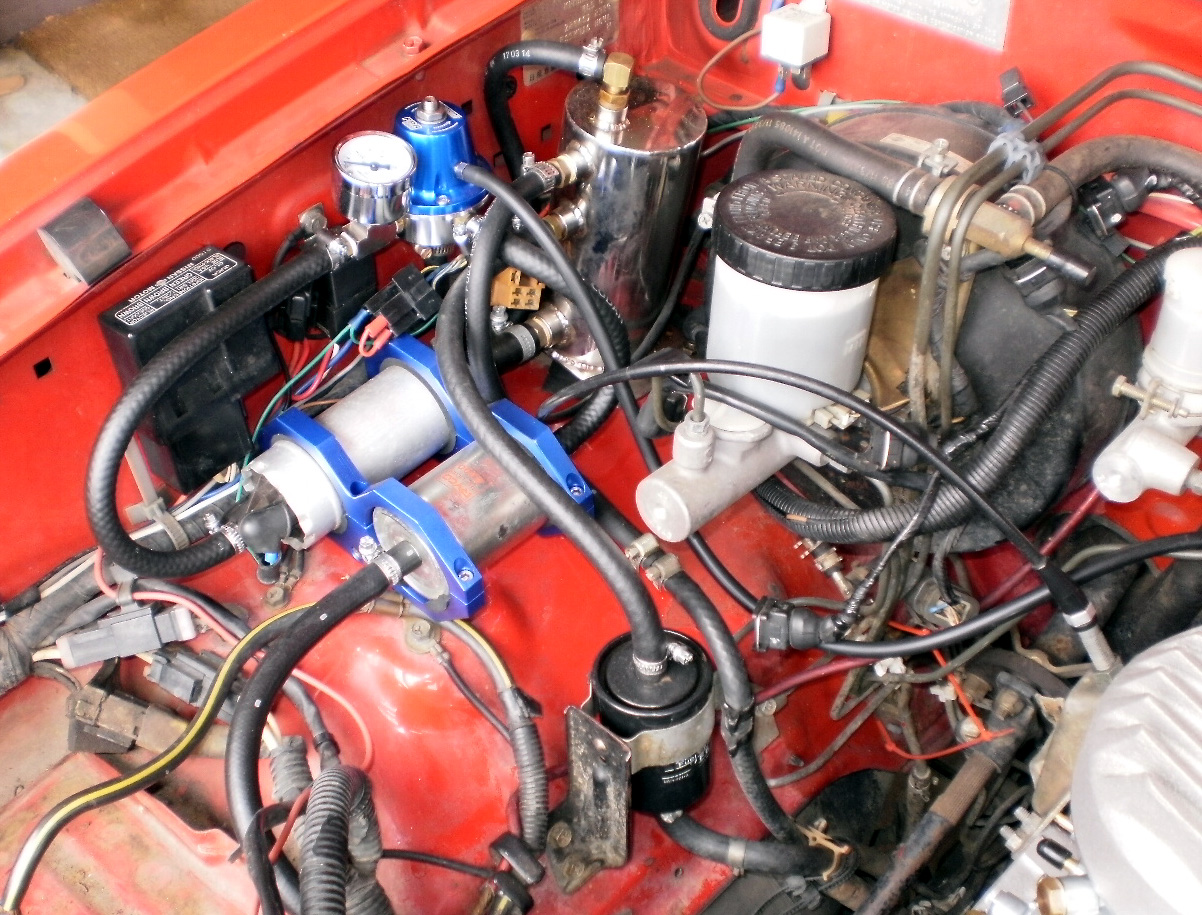
The fuel system is a high pressure 070 VL Turbo EFI pump fed by the stock low pressure pump, with our blow through carb fuel pressure regulator to drop the EFI pump output pressure down to carby levels (~6psi static fuel pressure) and to keep fuel pressure above boost pressure at all times. We used a surge tank and mounted everything in the engine bay for easy install, although we’ve had good results by simply plumbing the low pressure pump outlet directly into the high pressure pump inlet. This engine had a previous EFI conversion hence the surge tank was already fitted, so we used it.
The stock pump feeds fuel through the stock fuel filter (black unit in photo) to the surge tank in the right hand side corner of the engine bay. Any excess fuel gets returned back to the main tank. The EFI pump then gravity feeds from the surge tank, and feeds the fuel pressure reg, via the gauge and a tee piece. The output of the fuel pressure reg goes to the carby, via the fuel filter. The pump and filter are mounted together in the blue bracket. The fuel pressure reg drops the fuel pressure by bleeding pressure out of it's return port back to the surge tank. It looks more complicated than it really is, it is very simple, but to keep it compact, everything is close together and the hoses look a bit confusing. We provide full instructions on how to plumb this up with our blow through carby kits.
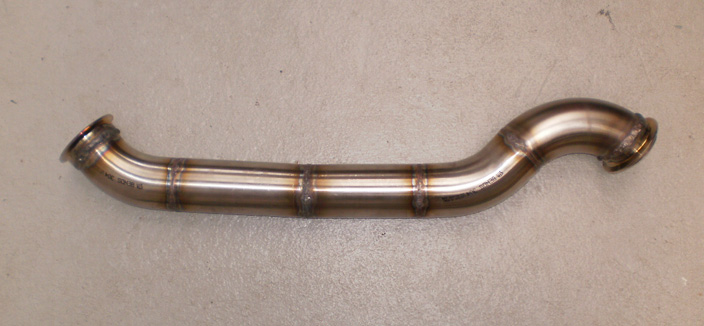
A 2.5” stainless dump pipe with v-band flanges was fabricated and connected to the original 2.0” exhaust system about half way along the gearbox. A conical 2.5” to 2.0” adaptor was used in an attempt to get a smooth transition, but we wanted to generally keep the stock exhaust system to show what can be achieved without changing it. A faily long 2.5" dump pipe was made to get the exhaust down to where the original system was, it couldn't be connected to the original exhaust higher up in the engine bay because the original pipe work was in a completely different location, but this is all simple stuff for an exhaust shop, whether you're getting exhaust pipe press bent to suit or using mandrel bends.
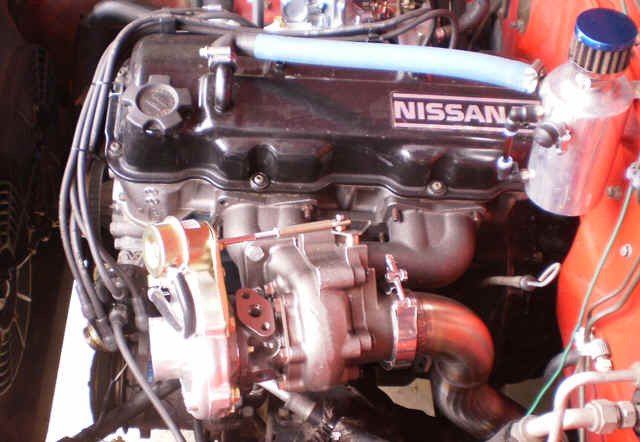
The turbo oil drain is usually a tough job to tackle, as it generally involves removing the sump, but the Z24 engine has a large crankcase breather port on the exhaust side just below the head. This is fortunately large enough, and just low enough to be used with our T3 turbo kit as the manifold positions the turbo above this breather port, so the oil can gravity drain back to the block.
Ideally we would alter the ignition timing curve, and this is something we can easily do by modifying the mechanical advance mechanism, or adding an electronic programmable box like the CB Performance unit we keep in stock. What this would do is let us have more timing at idle and part throttle, giving the engine more power in these areas and also getting better fuel economy, and the black box has the feature of having a fully programmable ignition curve along with boost retard. However without any expense (except the time to check the ignition timing) we set the static timing to 0deg, taking 8deg from the total advance, thus giving a crude boost retard, as under boost, the total timing is retarded 8deg compared to standard.
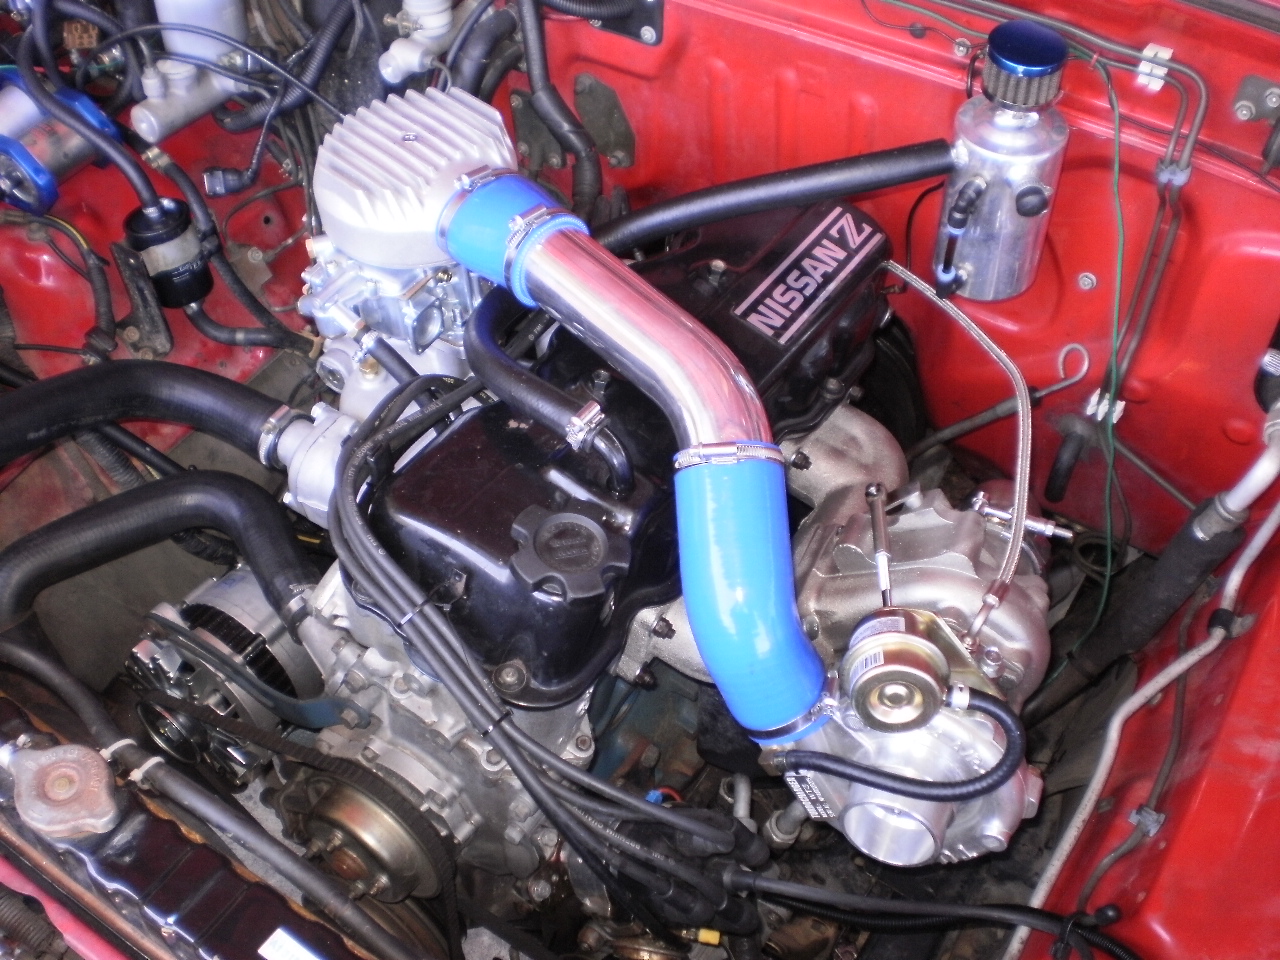
The turbo is sized to give good boost response (minimal turbo lag) as a lot of Navara drivers want an engine with low to mid range grunt for off-roading. The T3 produces boost from about 2000rpm, packing a big mid-range punch.
Dyno run #3a
|
As per dyno run #2, Stock Z24 block and head ~ 50,000kms since new rings & bearings | |
|
Electronic distributor running 0deg static advance. | |
|
Reproduction 32/36DGV and blow through carby fuel system | |
|
TurboDatsun T3 turbo kit | |
|
2.5" dump pipe transitioning into standard 2" exhaust system and mufflers | |
|
2.25" cross over pipe (no intercooling) |
The
Z24 made 94kW@wheels (126hp) @ 7psi of boost
This is a great result, a 54% peak power increase over the naturally aspirated Weber install, and only at 7psi of boost. If you consider the original carby only made 70hp, that gives us an 80% power increase at a low and safe 7psi boost. These Z24 engines obviously love a bit of boost!
The mixtures are lean for cruising economy, and nice and rich under boost when the secondary opens. Inlet temps were checked, and the max recorded was 75degC consistently during each dyno pull. So intercooling at this boost level will only provide a small improvement in engine output. Prolonged high boost runs such as pulling a heavy trailer up a long hill at full boost would increase these temps though, and an intercooler would be worthwhile a low boost setup, but in most cases you're not going to be at full throttle for extended periods stressing everything out.
After fine tuning the carby jetting for more boost, the next dyno run was done with the wastegate spring pre-loaded using the standard wastegate adjustable push rod (no external boost control) to give a increase in max boost.
Dyno run #3b
Coming soon ........ :)
March 2015
Then check out Stage 4 - Intercooled T3 turbo kit and blow through Weber 32/36DGV